This Kayaking for beginners guide is all you need to prepare you for your first adventure! We have covered everything that you will need to know before during and after your kayaking trip.
The very first thing you need to do is make sure you a dressed appropriately. If you want to find what the best gears to wear then go here. Now you are dressed appropriately you’re going to need a kayak, we have reviewed the best kayak for beginners help you with your choice.
First Lets go over some terminology I know when I first started kayaking I was getting confused about the terms my instructor was using!
Table of Contents
Kayak Terminology
PFD: Personal flotation device, or lifejacket. just to note if you are in the U.S.A, PFD’s must be approved by the Coast Guard.
Hull: The bottom shape of a boat, which determines how it will perform in various conditions. Canoes have a hull only, kayaks have a hull on the bottom and a deck on the top.
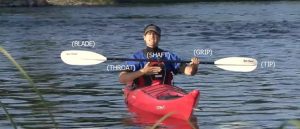
Blade: The Broad Part at the end of a paddle.
Portage: To carry a kayak over land (or the trail you carry it over) to get from one waterway to another or avoid a rapid.
Bow: The forward end of a canoe or kayak.
Swamp: To fill (a boat) with water.
Shaft: The long skinny part of a kayak paddle.
Stern: The rear end of a canoe or kayak.
Trim: The bow-to-stern leveling of a canoe or kayak that affects boat control. In most cases it should be nearly level, with the stern slightly lower in the water.
Information on this page is provided through our partnership with American Canoe Association (ACA) by staff writer Becky Molina.
www.americancanoe.org
[easyazon_image align=”center” height=”1600″ identifier=”B00EVII3BK” locale=”US” src=”https://images-na.ssl-images-amazon.com/images/I/71vRpNDmMrL.jpg” tag=”activexsports-20″ width=”1600″]
Different types of kayaks
To get you a up to speed you need to know all the different types of kayaks there are when i started i thought there were only 2! when in actual fact there is a total of 6. Below I explain what they are:
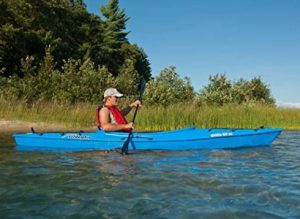
Recreational Kayaks: These are probably the most common type of boat for beginners. In general, they are made to row soft rivers, flat lakes and other less demanding situations. These boats are comfortable and easy to use, they are generally quite affordable. They have no specific task, but they are made to do a little bit of everything.
Tandem kayaks: are boats designed to drive two rowers. These can have any taste, provided the boat accommodates two people. This usually means two separate cockpits unless it’s on the kayak.
Fishing Kayaks: – They are specially designed for anglers. These usually have extra space for equipment and enough space to feel comfortable. You also want specific items for fishing, such as rod holders and even an anchor.
Whitewater Kayaks: They are designed to meet the unique challenges of paddling in rough and fast waters. If you live in an area with good backwaters for white water and you plan to participate in this sport, a white water kayak is your best option! Do not try to use a recreational whitewater kayak; It will not end well.
Touring Kayaks: These are mainly purpose built boats that work well in open water during long journeys. They are usually designed for speed, efficiency and long journeys. These boats often have room for camping equipment and are designed to withstand the rigors of unique situations such as sea kayaking.
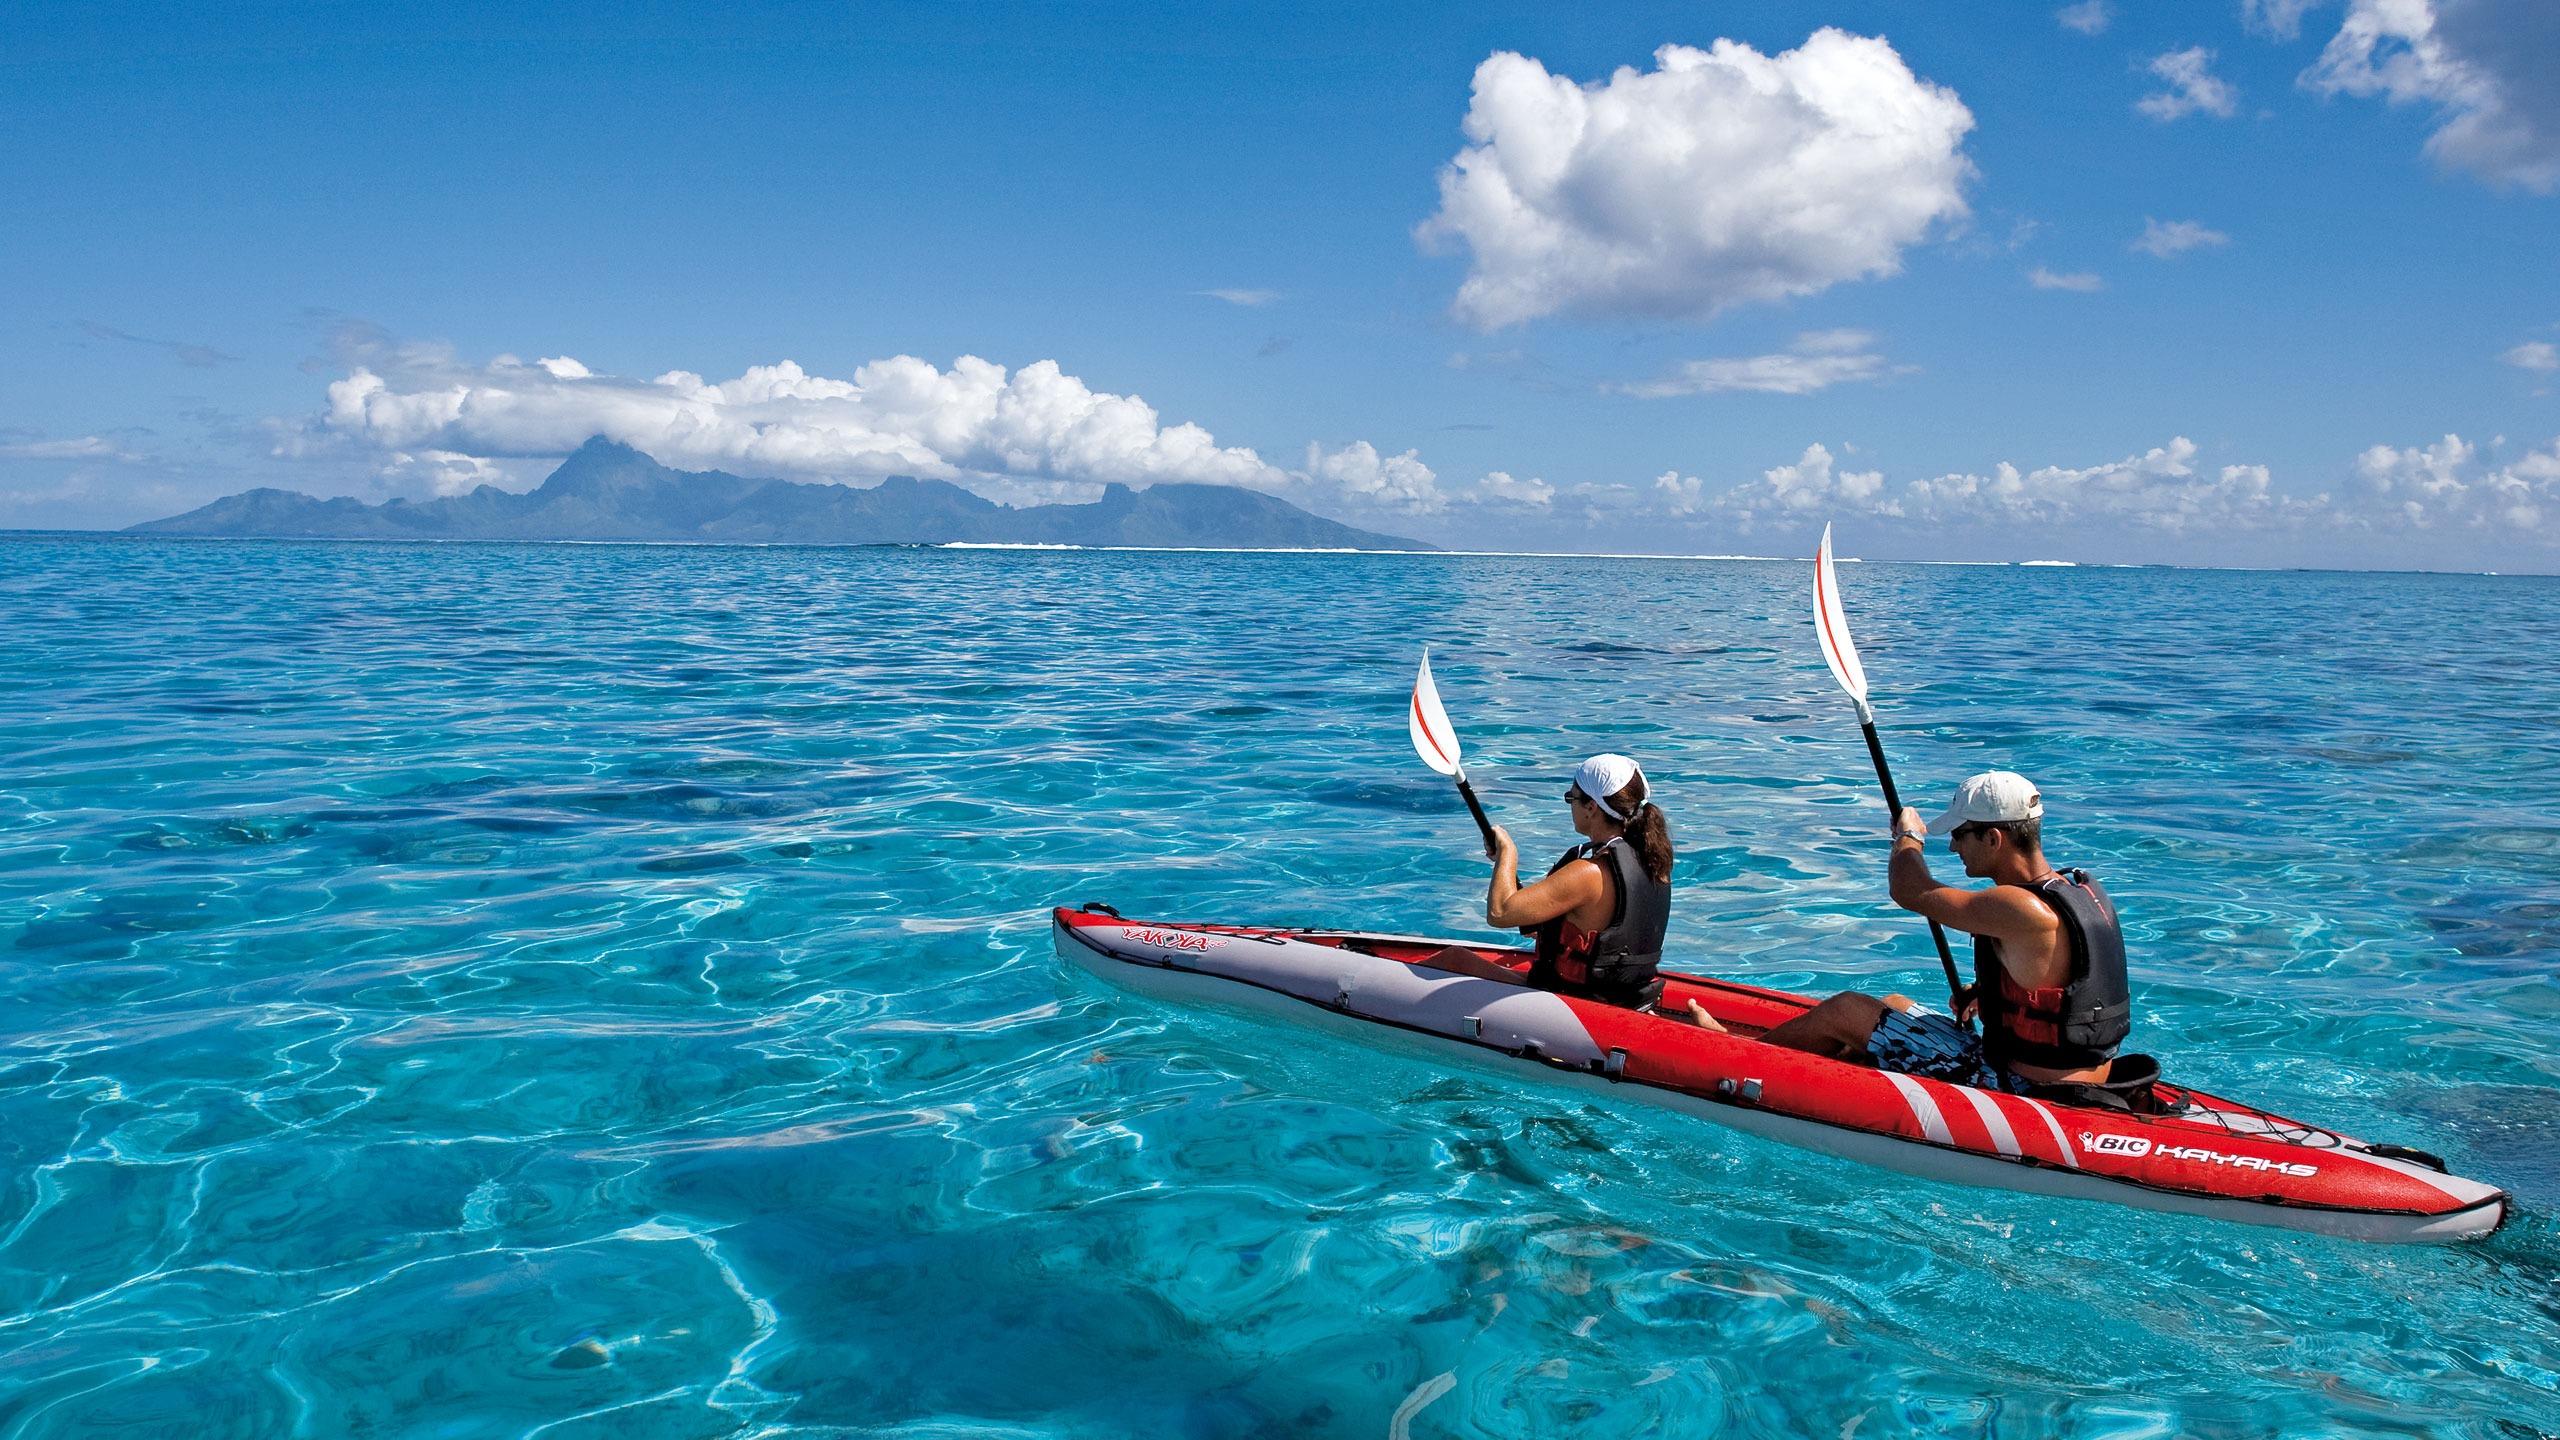
Foldable and inflatable kayaks: are alternative options that can be great options for some. These inflatable kayaks can literally be folded or inflated to fit in backpacks, cars and easily transportable spaces.
Sit on top VS Sit in kayaks
Sit on top of kayaks

Sit on top of kayaks – is a relatively new popular trend in the boat industry. They offer many advantages, such as simplicity, robustness, ease of use and self-discharge.
Because you sit on top of the kayak, there is a lot of room to move and space for equipment, alcohol or other goodies. These are excellent fish kayaks and recreational kayaks!
Sit in kayaks
Sit in kayaks – As a seated top kayak, sitting inside kayaks have a chair and foot pedals / pegs so you can get
comfortable paddling. Instead of standing on top of the kayak, you are in a closed cockpit.
With this type of kayak you have some protection against the elements and you can attach a so-called “spray skirt” that gives you even more protection against wind and water.
To give you more insight let’s have a look at the pros and cons of the Sit-on-Top and Sit –in Kayak.
Pros and Cons of Sit-on-Top Kayaks
Pros:
![]() A Sit on top is easier for beginners, it is easier to get in and out. If you are don’t like confined space then the sit on top is best for you.
A Sit on top is easier for beginners, it is easier to get in and out. If you are don’t like confined space then the sit on top is best for you.
 A sitting kayak is free because it has “scupper holes”. These are holes through which the splashed water can be drained from the kayak.
Cons:
![]() This type of kayak is ideal for warm climatic conditions and warm water.
This type of kayak is ideal for warm climatic conditions and warm water.
 It is much more likely that you get wet by splashing waves and water from paddles.
Pros and Cons of Sit-In Kayaks
Pros:
A Sit in kayak protects the lower body from the wind, making it a warmer experience.
It has a lower profile, so it’s a bit easier to paddle because the wind resistance is lower. It also gives you a lower center of gravity that makes it more stable than a sit on top kayak.
Cons:
It’s harder to get in and out of a Sit in kayak, so if you are not flexible, this may not be the best type of kayak for you.
They are not smooth, if the water splashes the kayak, you have to turn it to over and empty it.
Which is the Better Kayak: Sit-in-Kayak or Sit-on-top-Kayak?
 So, let me say that one is not better than the other, it solely depends only on what you like best. Personally, I prefer the Sit in Kayaks, but that’s just me. Here are some questions to help you decide:
1. Where do you go kayaking? Will it mainly be in calm / protected waters or in the ocean? remember that a sit-in kayak protects you much better against the elements and that you can use a spray skirt that offers even more protection.
2. Are you worried about kayaking? A sit in kayak is stable because you are lower in the kayak and you have a lower center of gravity that gives you more stability. Just remember that it is difficult to come back in the kayak and possible to immerse a yourself in a sit-in kayak.
3. In what circumstances will it be used? If you use kayaking in cold water and cold weather, a sit in kayak may be best for you because it protects you more. If a predominantly warm climate, then a sit on top may be the best option.
Kayak Materials
You can find kayaks made with a variety of different materials, but there are some common types. For kayaks for beginners, these are usually two different types of plastic. Of course, you can also find advanced (and expensive) kayaks made of wood or composite fibers.
ABS (acrylonitrile-butadiene-styrene): ABS plastic is the second most recognisable construction material for kayaks. It is a bit lighter and offers mechanical superiority compared to motor boats.
ABS is naturally a little more resistant to UV rays than polyethylene, but you’ll want to keep it in the shade for a long life.
Polyethylene: is the material of choice for inexpensive kayaks for beginners. Polyethylene is durable, resistant and resistant to tons of wear.
These kayaks are by far the most common and of the kind you probably find in most sporting goods stores. However, they can be vulnerable if they are drilled, for example, against a sharp rock.
They are also the heaviest option and are sensitive to UV damage due to prolonged exposure to the sun, so keep them in the shade.
Getting in and out of a kayak
This is essential to have some knowledge of this instead of just trying to figure it out yourself. See below on tips on getting in a Kayak in water
https://www.youtube.com/watch?v=NZs2_PTbCXk
There are 2 methods to getting yourself into your kayak. First for of all you want to get in water below your knees.
- Then for the first method you want to put one foot in the boat.
- Next you want move your right hand and proceed to lowering yourself in boat.
- Next you want to grab you paddle and you are ready to go!
The second method if your less flexible. you firmly grab both sides of the boat
- You put both hands on the boat seat area and proceed to sit down on the edge
- You then move your left hand to your side
- Then proceed to lower yourself in the boat and you are done!
How to paddle a kayak basic techniques
 After you have got into your boat safely you want to pick the best paddle for yourself. You may ask yourself what size paddle do I need for my kayak? have a look out our kayak paddle length chart below.
| Kayak Width | Under 23" | 24" - 28" | 29"-33" | 34"+ |
|---|---|---|---|---|
| Paddler Height | Recommended Paddle Length | |||
| Under 5'5" | 210cm | 220cm | 230cm | 240cm |
| 5'5"-5'11" | 220cm | 230cm | 240cm | 250cm |
| over 6" | 220cm | 230cm | 250cm | 260cm |
Paddling Strokes/Techniques
Forward Stroke
This is the most simple and common of all the different strokes. There a 4 key positions of the forward stroke they are
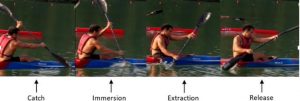
To have the most effective stroke you will need to use your legs to power through your motion. If you only use your arms you will get tired a lot quicker. The grip on the paddle must be relaxed yet firm. The loose grip will indicate to the rest of your body to stay relaxed.
Tips for executing a good forward stroke.
- Sit up straight and keep your right elbow as straight as possible. Place the right side of the blade in the water – place this blade as far as possible.
- Sitting upright, begin to move the paddle with your right side and pull the blade towards you, keeping the paddle and the right arm almost straight.
- With the right arm still as straight as possible, continue pulling the blade towards the back of the kayak until the blade is about 10 inches from the edge of the boat.
- Repeat these steps until you steer the kayak in your desired direction.
The basic reverse stroke
This stroke is very similar to the forward stroke but as the name suggests you do this stroke in reverse. This stroke is vital as you may be stuck somewhere and the only way to get out is reverse!
To do this stroke you will keep the paddle close to your boat and push the water forward and release. Do this until you are back in a comfortable position.
Carving Turns
When the kayak is edged, the curved section of the hull is underwater, which forces the kayak to turn to the opposite side of the edging. The amount of edging you’ll need changes on the type of kayak you use. There is a video below as it best to visualize this turn.
Sculling Draw or Sideways
This stroke allows you to move your boat to the side without having to make a big turn. To do this, you will have to tilt the blade almost vertically in the air. You can push the water away or pull it towards your boat. At the end of the movement, turn the paddle so that it channels the water without splashing it.
Rolling the Kayak
It will not happen often, but when it does, you have to know how to reset yourself. We strongly recommend that you learn to do this before using these skills. Basically, you roll in a certain direction and when you are upside down, you shift your paddle and body weight to turn you right side up again.
I strongly recommend you to practice this with a group in a controlled environment this will be less dangerous than a lake.
To settle when you are underwater, you will have to make movements. The first is to extend the blade as far as possible and to hit it by turning the sides.
There are also 3 Golden rules when paddling
- Use a Co-operative division of your body, which means while your upper body is doing a task your lower body should be working on a task as well such as moving your hips and rotating your arms in sync.
- Maintain Power position. this means your arms chest maintain a sort of box and while paddling you want to maintain that box.
- Torso Rotation. This give you more power and keeps your shoulders safe
The different parts of the paddle are show below
Essential Safety Tips for Kayaking
Sizing guide for PFD for Kayaks
For adults, the size of your chest, not your weight, will determine the size of the PFD you need. (For children, their weight will determine the size). To obtain the size of the chest, measure the circumference of the chest at the widest point. Use this number in conjunction with the manufacturer’s recommendations of the PFD to find the perfect fit for you.
The right fit for your PFD
With a standard PFD, loosen all straps, attach the PFD and close it. With an inflatable, place it over your head (if it’s a vest style) or hang it around your waist.
Begin with the wasit and tighten all the straps. If you have shoulder straps, do them last. It should feel good but not uncomfortable.
With a standard PFD, ask someone to pull the shoulders of the PFD. If it extends beyond the nose or head, tighten the straps. If it goes back up, the PFD is too big.
A properly sized PFD should fit like a glove, allowing you to move freely and not rub while you row and play.
PFD adjustment tips
For the best feeling and adaptation during the PFD attempt, wear the clothes you would wear while paddling.
Check your movements to make sure it is comfortable and does not bother you when you row. If you are a rower, take a palette and imitate the movement of the palette. It is best to do this in your boat at home. This will simulate how you feel when you paddling. Most kayakers believe that a short PFD works better.
Women-specific PFDs generally offer a better fit than women’s unisex garments, thanks to contoured cuts for bust lines and styles designed for women’s torso section.
What to do if Kayak fills with water
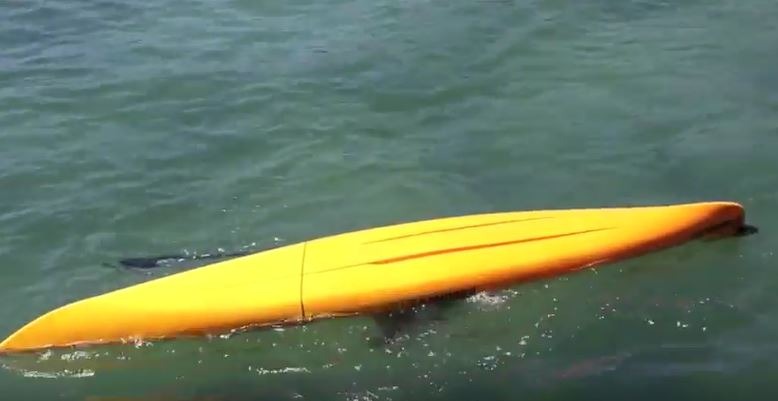 Emptying a kayak filled with water can be an onerous task to complete alone. A kayak filled with water can be very heavy and feel even heavier trying to stay afloat. For this reason, it is always good to evaluate the situation before acting.
The first thing to do is to determine the amount of water in your kayak and how far you are from the mainland.
If there is too much water in your kayak, you may not want to move around too much. Holding the bow of your kayak and swimming to shore could be an easier option than trying to drain while swimming.
If this is a viable option, just swim on land while pulling the Kayak. Pull the kayak on to the ground and tilt the sides of the kayak to drain the water.
This will probably have to be repeated several times before emptying the kayak completely.
If this is not possible, you can empty the water from the kayak while you swim.
Step 1: Swim to the bow of the kayak and take the bow with both hands.
Be sure to keep track of your paddle if you do not have a paddle strap. It would be unfortunate to empty your water kayak, but lose your paddle on top of it!
Step 2: Try to raise the bow of the kayak by kicking your legs and using your arms and shoulders to lift the bow.
Once the cockpit is above the water, the kayak should begin to empty. If you have the strength, you can also rotate the kayak from side to side to drain more water at a time.
Step 3: Repeat until almost exhausted.
It is important to mention that this can be done essentially in the opposite direction when you climb the stern and the weight of the body lifts the kayak. This requires you to be a little heavier, but this technique is a viable alternative.
Step 4: Lift and flip the kayak with the right side up.
At this point, the kayak should be almost empty and ready to return. Once back in a kayak, you can use a bilge pump to drain the excess water. If you do not have a bilge pump, you can buy one if you plan to kayak in rough seas. This could save a lot of time and energy, and they are
Kayaking tips
It is very good practice to planning your Kayaking trip route ahead of time and plan out what route you are going to take, it’s the best way to get the most out of your trip and saves time deciding what to do once you’re on the water.
We have an article links on a number of essential accessorize to bring along with you on your kayaking trip, if you want to delve a bit deeper and fully prepare yourself for your sea adventure.
Taking a cooler along with you is also very helpful, it certainly helps me when I’m hot and need a drink to cool down. Nothing is more annoying than being in the middle of a river with nowhere to get a refreshment
Take along a set of waterproof binoculars
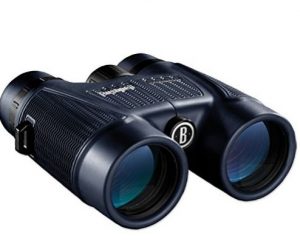 and a waterproof camera rather then your phone to avoid water damage
 Also bringing along a compass will help you navigate through the waters with much ease.
There are a number of apps to help you with navigation in case you have forgotten to bring a compass or just prefer to use your phone.
How to tie knots for beginners
It’s very important to bring along a rope and learn how to tie a few different styles of knots so that you can tie your kayak up when not in use.
Below is a beginners guide to basic boating knots.
https://www.youtube.com/watch?v=hrampH94LY8
Hopefully after reading this guide it should give you a bit more knowledge on Kayaking and you shouldn’t be a complete beginner anymore. Do check out our other articles to further your knowledge as the more you know the better your Kayak trip will be!